 ElasticSearch可视化工具介绍
# 一、elasticsearch-head
# 1、拉取镜像
docker pull mobz/elasticsearch-head:5
docker tag docker.io/mobz/elasticsearch-head:5 es_head
docker rmi docker.io/mobz/elasticsearch-head:5
1
2
3
2
3
# 2、创建容器
docker run -itd --name es_head -p 9100:9100 es_head
1
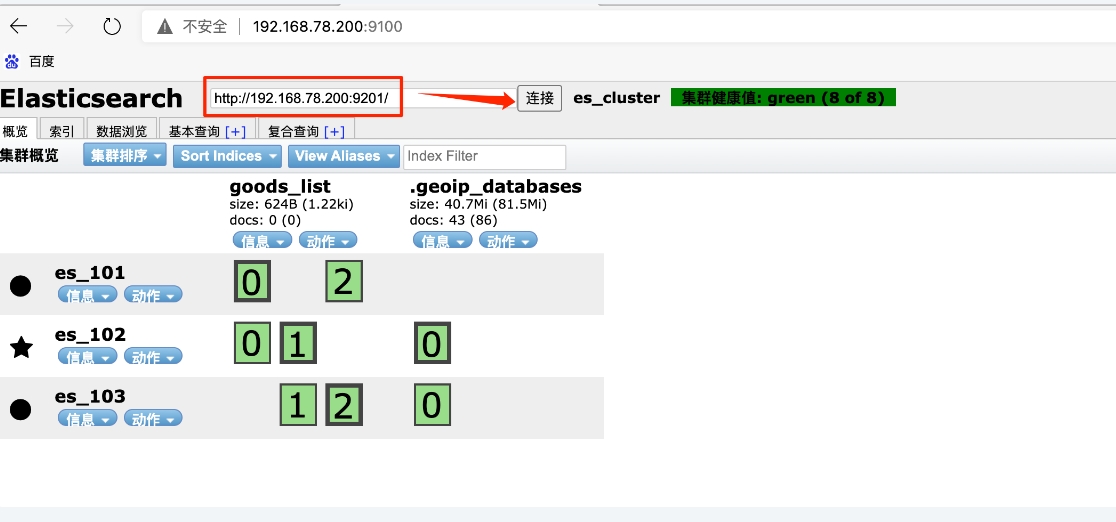
# 3、访问 192.168.78.200:9100

# 4、通过postman添加为es集群添加一个索引

测试json:
{
    "settings": {
        "number_of_shards": 3,
        "number_of_replicas": 1
    },
    "mappings": {
        "properties": {
            "id": {
                "type": "keyword"
            },
            "country": {
                "type": "keyword"
            },
            "remark": {
                "type": "text"
            }
        }
    }
}
1
2
3
4
5
6
7
8
9
10
11
12
13
14
15
16
17
18
19
2
3
4
5
6
7
8
9
10
11
12
13
14
15
16
17
18
19
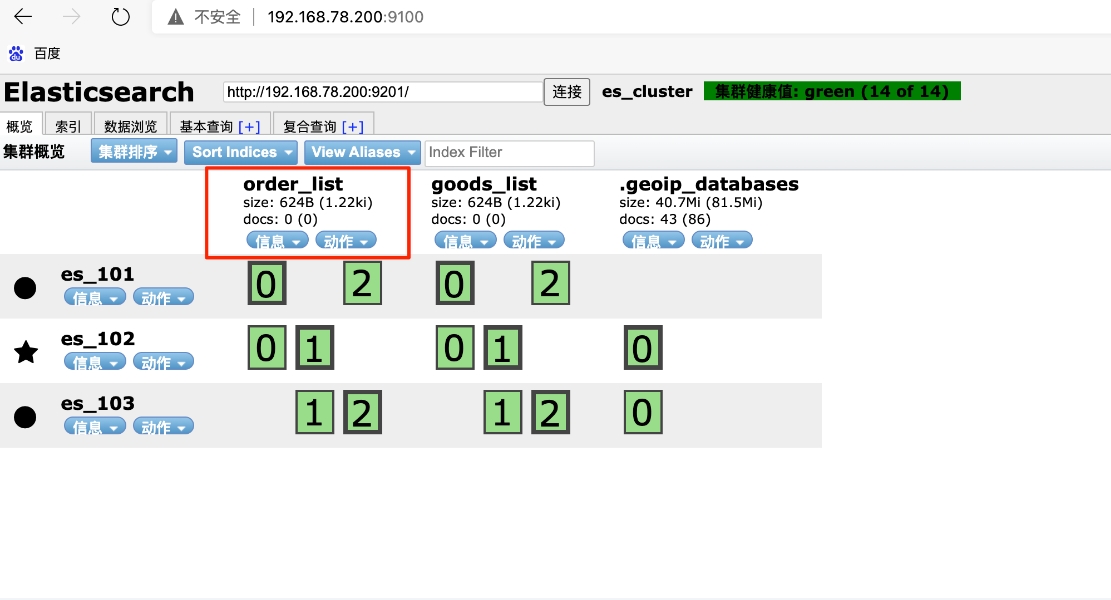
# 5、我们再访问192.168.78.200:9100,查看结果:

# 6、总结及注意
通过elasticsearch-head,我们可以清晰看到数据分片情况,这点是kibana做不到的,后续使用时会有深刻感受,二者结合才是王道。
注意:如果这一步没有添加成功,返回结果是{ "acknowledged": true, "shards_acknowledged": false} ,那很有可能是磁盘空间不足了。
使用df -h命令查看一下,超过95%使用率,es就不会再允许往es里写数据了。

# 二、kibana
# 1、拉取镜像
docker pull kibana:7.14.1
docker tag docker.io/kibana:7.14.1 kibana
docker rmi docker.io/kibana:7.14.1
1
2
3
2
3
# 2、创建容器
docker run -itd --name kibana --network elasticsearch_default --link es_101:elasticsearch -p 5800:5601 kibana
1
注意,我这里指定了kibana容器和es集群的三个容器使用了同一个网络,所以可以直接用容器名做外连,将kibana内部配置文件中的elasticsearch直接解析为es_101。
如果不指定使用es的网络,则需要进入容器内配置ElasticSearch的实际ip地址
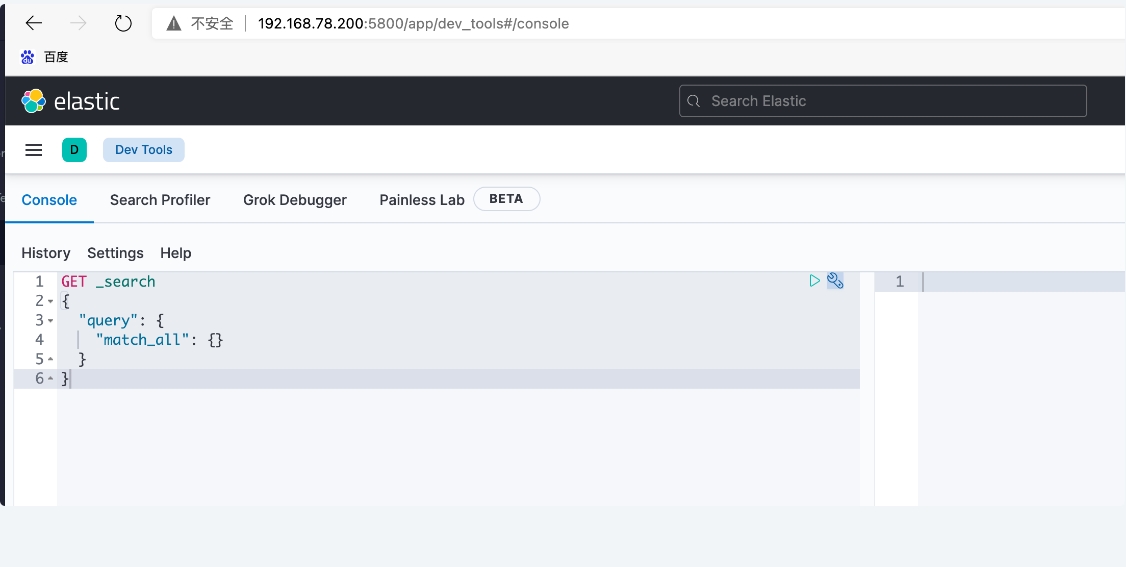
# 3、查看结果
访问 http://192.168.78.200:5800/app/dev_tools#/console

# 三、elasticHD
# 1、下载镜像
docker pull containerize/elastichd
docker tag docker.io/containerize/elastichd elastichd
docker rmi docker.io/containerize/elastichd
1
2
3
2
3
# 2、创建容器
docker run -p 5900:9800 -d --network elasticsearch_default --link es_101:demo elastichd
1
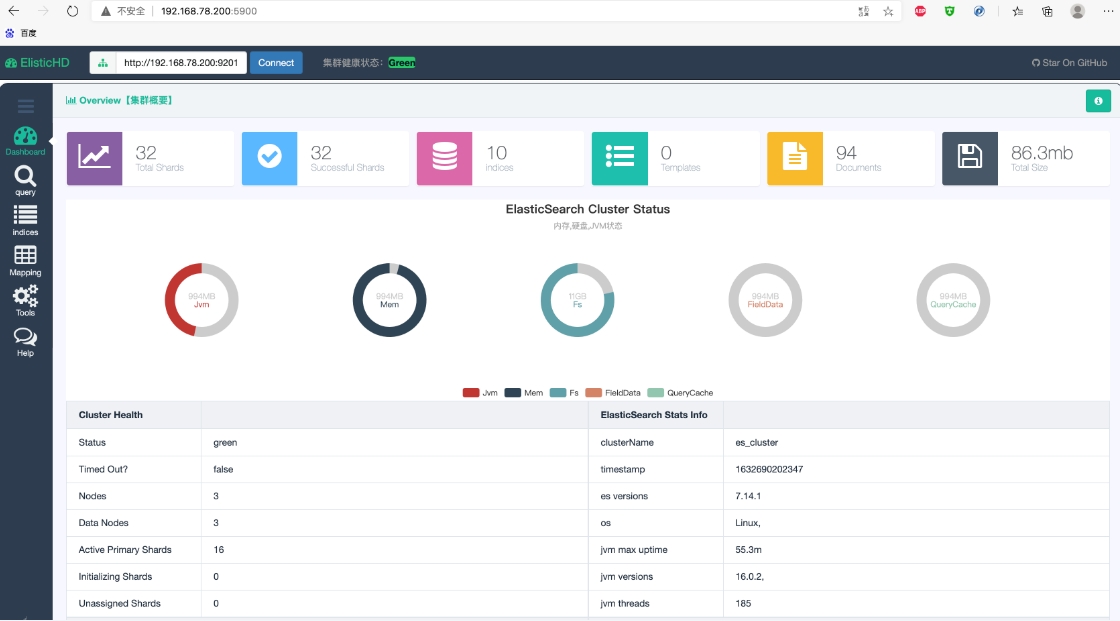
# 3、查看结果
访问 http://192.168.78.200:5900 (opens new window)


上次更新: 2024/04/16, 17:30:00

 |
|